
Bitnami Redmine 3.2.1をさくらのVPS(CentOS 6.7)にインストール
目次
概要
さくらインターネットが提供擦る「さくらのVPS」を利用して、オープンソースのプロジェクト管理ソフトウェアであるRedmineの環境を構築します。 Redmineを利用するためにはOS(Linux)、データベース(PostgreSQL)、Webサーバ(Apache)、Rubyなどの実行環境を準備する必要があります。 これらのノウハウがないと導入はかなり敷居が高いと言えます。 そんなとき便利なのが、Redmineを導入するために必要なOS以外のデータベースやWebサーバなどをRedmineと一緒にパッケージングした『Bitnami Redmine』です。 Bitnami Redmineはオープンソースソフトウェアのみで構成されているため、無料で利用することができます。 サーバ環境として利用するさくらのVPSは有料サービスですが、2週間無料でお試し利用できます(2017年4月29日時点)。 本格運用前に導入手順やレスポンス(性能)を試すには十分な期間なので、是非利用してみてください。
![]()
構成
想定環境
Redmineを構築するサーバ環境としてさくらインターネットが提供する「さくらのVPS」を利用しました。 サーバのスペックは以下のとおりです。
| 項目 | 内容 |
|---|---|
| CPU | 仮想2コア |
| メモリ | 1GB |
| ディスク | SSD 30GB |
| リージョン | 東京 |
| 価格 | 月額972円(税込) |
サーバ構成
OSバージョン
CentOS 6.7 x86_64
ソフトウェア・パッケージ一覧
2016年3月19日時点で最新のLinux版「Redmine 3.2.1-0(64bit)」を以下のBitnamiのサイトからダウンロードして使用しました。
【関連サイト】
bitnami Redmine Installers
- bitnami-redmine-3.2.1-0-linux-x64-installer.run
クライアント構成
OSバージョン
Windows 7 Ultimate Service Pack 1 64bit
ソフトウェア・パッケージ一覧
- Internet Explorer 11
サーバ構築
インストール
Bitnami Redmineのダウンロード
インストールするBitnami Redmine 3.2.1-0のインストールバイナリモジュールを入手します。 wgetコマンドでBitnamiのサイトから直接ファイルをダウンロードします。 ダウンロード先はサーバの /media/rpm/ ディレクトリとしますが、どこでも良いです。
# cd /media/
# mkdir rpm
# cd rpm
# wget https://bitnami.com/redirect/to/98602/bitnami-redmine-3.2.1-0-linux-x64-installer.run
--2016-03-19 05:47:56--  https://bitnami.com/redirect/to/98602/bitnami-redmine-3.2.1-0-linux-x64-installer.run
Resolving bitnami.com... 50.17.235.25
Connecting to bitnami.com|50.17.235.25|:443... connected.
HTTP request sent, awaiting response... 302 Found
Location: https://downloads.bitnami.com/files/stacks/redmine/3.2.1-0/bitnami-redmine-3.2.1-0-linux-x64-installer.run [following]
--2016-03-19 05:47:56--  https://downloads.bitnami.com/files/stacks/redmine/3.2.1-0/bitnami-redmine-3.2.1-0-linux-x64-installer.run
Resolving downloads.bitnami.com... 54.192.234.202, 54.192.234.126, 54.192.234.215, ...
Connecting to downloads.bitnami.com|54.192.234.202|:443... connected.
HTTP request sent, awaiting response... 200 OK
Length: 155939579 (149M) [binary/octet-stream]
Saving to: “bitnami-redmine-3.2.1-0-linux-x64-installer.run”

100%[==================================================================================================>] 155,939,579  232K/s   in 10m 57s

2016-03-19 05:58:54 (232 KB/s) - “bitnami-redmine-3.2.1-0-linux-x64-installer.run” saved [155939579/155939579]

# ls -l
total 152288
-rw-r--r--. 1 root root 155939579 Mar 17 19:06 bitnami-redmine-3.2.1-0-linux-x64-installer.run
# chmod 744 ./bitnami-redmine-3.2.1-0-linux-x64-installer.run
# ls -l
total 152288
-rwxr--r--. 1 root root 155939579 Mar 17 19:06 bitnami-redmine-3.2.1-0-linux-x64-installer.run
Bitnami Redmineのインストール
ダウンロードしたBitnami Redmine 3.2.1-0をインストールします。 1つのインストールモジュールの実行で必要なソフトウェアが一通りインストールされ、Redmineが起動します。
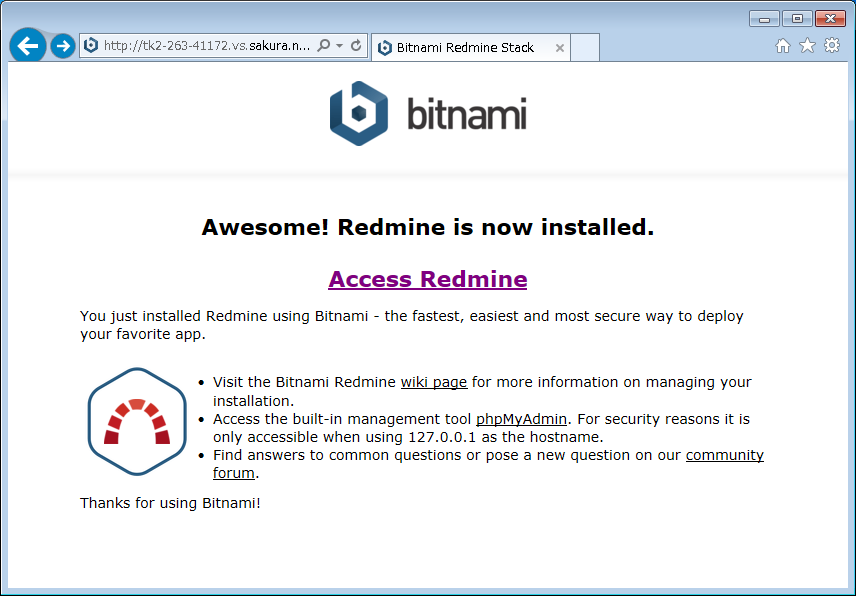
# ./bitnami-redmine-3.2.1-0-linux-x64-installer.run
Language Selection

Please select the installation language
[1] English - English
[2] Spanish - Espanol
[3] Japanese - 日本語
[4] Korean - ???
[5] Simplified Chinese - ?体中文
[6] Hebrew - ?????
[7] German - Deutsch
[8] Romanian - Roman?
[9] Russian - Русский
Please choose an option [1] : 3 ←入力して[Enter]キーを押す
----------------------------------------------------------------------------
ようこそ Bitnami Redmine Stack セットアップウィザードへ。

----------------------------------------------------------------------------
インストールするコンポーネントを選択してください。準備ができたら“次へ“をクリックしてください。

Subversion [Y/n] :Y ←入力して[Enter]キーを押す

PhpMyAdmin [Y/n] :Y ←入力して[Enter]キーを押す

Redmine : Y (Cannot be edited)

Git [Y/n] :Y ←入力して[Enter]キーを押す

上記選択部分が正しいことを確認してください。 [Y/n]: Y ←入力して[Enter]キーを押す

----------------------------------------------------------------------------
Installation folder

Bitnami Redmine Stack をインストールするフォルダを選択してください。

フォルダを選択 [/opt/redmine-3.2.1-0]: ←[Enter]キーを押す

----------------------------------------------------------------------------
管理者アカウントの作成

Bitnami Redmine Stack の管理者アカウントを作成します。

表示用氏名 [User Name]: RANOCCI ←入力して[Enter]キーを押す

Email アドレス [user@example.com]: webmaster@ranonet.com ←入力して[Enter]キーを押す

ログイン名 [user]: admin ←入力して[Enter]キーを押す

パスワード : ←パスワードを入力して[Enter]キーを押す
確認のためにパスワードをもう一度入れてください : ←上と同じパスワードを入力して[Enter]キーを押す
----------------------------------------------------------------------------
データベースに保管する際の既定の言語

データベース設定の規定値として使用する言語を選択してください:

[1] Bulgarian
[2] Czech
[3] German
[4] English
[5] Spanish
[6] French
[7] Hebrew
[8] Italian
[9] 日本語
[10] 韓国語
[11] Dutch
[12] Polish
[13] Portuguese
[14] Portuguese/Brazilian
[15] Romanian
[16] Russian
[17] Serbian
[18] Swedish
[19] Chinese
[20] Chinese/Taiwan
オプションを選択してください [9] : ←[Enter]キーを押す

Do you want to configure mail support? [y/N]: N ←入力して[Enter]キーを押す

----------------------------------------------------------------------------
お使いのコンピュータに Bitnami Redmine Stack をインストールする準備が整いました。

続けますか? [Y/n]: Y ←入力して[Enter]キーを押す

----------------------------------------------------------------------------
しばらくお待ちください。 Bitnami Redmine Stack をお使いのコンピュータにインストール中です。

 インストール中
 0% ______________ 50% ______________ 100%
 #########################################

----------------------------------------------------------------------------
セットアップウィザードによる Bitnami Redmine Stack のインストールが完了しました。

Redmine アプリケーション起動 [Y/n]: Y ←入力して[Enter]キーを押す

情報: Bitnami Redmine Stack については、ブラウザで
http://127.0.0.1:80 にアクセスしてください。
続けるには [Enter] キーを押してください : ←[Enter]キーを押す
設定
Bitnami Redmineの自動起動設定
Linux起動に伴ってRedmineが自動起動するようにrcに登録します。 起動スクリプトはRedmineで準備されているため、それを流用します。
# cd /etc/rc.d/init.d/
# cp -piv /opt/redmine-3.2.1-0/ctlscript.sh ./bitnami-redmine
`/opt/redmine-3.2.1-0/ctlscript.sh' -> `./bitnami-redmine'
# vi bitnami-redmine
※以下、該当する行を追加※
#!/bin/sh

#chkconfig: 2345 80 30 ←この行を追加
#description: BitNami Service ←この行を追加

# Allow only root execution
if [ `id|sed -e s/uid=//g -e s/\(.*//g` -ne 0 ]; then
    echo "This script requires root privileges"
    exit 1
fi
# chkconfig --add bitnami-redmine
# echo $?
0
# chkconfig --list bitnami-redmine
bitnami-redmine 0:off   1:off   2:on    3:on    4:on    5:on    6:off
ファイアウォールにHTTPでの接続許可設定
CentOS 6.7の初期状態ではiptables(ホストベースのファイアウォール)の設定でHTTPプロトコルによる接続が許可されていません。 iptablesにHTTPプロトコル(80/tcp)での接続許可設定を追加します。 追加した設定はLinuxをリブートすると消えてしまいますので、iptablesの設定ファイルに書き込みを行います。
# iptables -L
Chain INPUT (policy ACCEPT)
target     prot opt source               destination
ACCEPT     all  --  anywhere             anywhere            state RELATED,ESTABLISHED
ACCEPT     icmp --  anywhere             anywhere
ACCEPT     all  --  anywhere             anywhere
ACCEPT     tcp  --  anywhere             anywhere            state NEW tcp dpt:ssh
REJECT     all  --  anywhere             anywhere            reject-with icmp-host-prohibited

Chain FORWARD (policy ACCEPT)
target     prot opt source               destination
REJECT     all  --  anywhere             anywhere            reject-with icmp-host-prohibited

Chain OUTPUT (policy ACCEPT)
target     prot opt source               destination
# iptables -I INPUT 5 -p tcp --dport 80 -j ACCEPT
# iptables -L
Chain INPUT (policy ACCEPT)
target     prot opt source               destination
ACCEPT     all  --  anywhere             anywhere            state RELATED,ESTABLISHED
ACCEPT     icmp --  anywhere             anywhere
ACCEPT     all  --  anywhere             anywhere
ACCEPT     tcp  --  anywhere             anywhere            state NEW tcp dpt:ssh
ACCEPT     tcp  --  anywhere             anywhere            tcp dpt:http ←ここに追加
REJECT     all  --  anywhere             anywhere            reject-with icmp-host-prohibited

Chain FORWARD (policy ACCEPT)
target     prot opt source               destination
REJECT     all  --  anywhere             anywhere            reject-with icmp-host-prohibited

Chain OUTPUT (policy ACCEPT)
target     prot opt source               destination
# service iptables save ←忘れずに設定を保存
iptables: Saving firewall rules to /etc/sysconfig/iptables:[  OK  ]
動作テスト
Bitnami Redmineのステータス確認
rcスクリプトを利用してBitnami Redmineのステータスを確認します。 全てrunningと表示されたら正常に起動しています。
# service bitnami-redmine status
subversion already running
apache already running
mysql already running
プロセスの起動確認
Bitnami Redmineのインストールに伴って自動でインストールされるApacheとMySQL、Subversionのプロセスが起動していることを確認します。
# ps -ef | grep httpd
root     11881  2755  0 18:39 pts/0    00:00:00 grep httpd
root     24983     1  0 06:05 ?        00:00:07 /opt/redmine-3.2.1-0/apache2/bin/httpd.bin -f /opt/redmine-3.2.1-0/apache2/conf/httpd.conf
daemon   25007 24983  0 06:05 ?        00:00:00 /opt/redmine-3.2.1-0/apache2/bin/httpd.bin -f /opt/redmine-3.2.1-0/apache2/conf/httpd.conf
daemon   25008 24983  0 06:05 ?        00:00:04 /opt/redmine-3.2.1-0/apache2/bin/httpd.bin -f /opt/redmine-3.2.1-0/apache2/conf/httpd.conf
daemon   25009 24983  0 06:05 ?        00:00:04 /opt/redmine-3.2.1-0/apache2/bin/httpd.bin -f /opt/redmine-3.2.1-0/apache2/conf/httpd.conf
daemon   25010 24983  0 06:05 ?        00:00:00 /opt/redmine-3.2.1-0/apache2/bin/httpd.bin -f /opt/redmine-3.2.1-0/apache2/conf/httpd.conf
daemon   25011 24983  0 06:05 ?        00:00:03 /opt/redmine-3.2.1-0/apache2/bin/httpd.bin -f /opt/redmine-3.2.1-0/apache2/conf/httpd.conf
daemon   25052 24983  0 06:05 ?        00:00:00 /opt/redmine-3.2.1-0/apache2/bin/httpd.bin -f /opt/redmine-3.2.1-0/apache2/conf/httpd.conf
daemon   26265 24983  0 06:42 ?        00:00:00 /opt/redmine-3.2.1-0/apache2/bin/httpd.bin -f /opt/redmine-3.2.1-0/apache2/conf/httpd.conf
daemon   26397 24983  0 06:47 ?        00:00:00 /opt/redmine-3.2.1-0/apache2/bin/httpd.bin -f /opt/redmine-3.2.1-0/apache2/conf/httpd.conf
daemon   26398 24983  0 06:47 ?        00:00:00 /opt/redmine-3.2.1-0/apache2/bin/httpd.bin -f /opt/redmine-3.2.1-0/apache2/conf/httpd.conf
daemon   26399 24983  0 06:47 ?        00:00:02 /opt/redmine-3.2.1-0/apache2/bin/httpd.bin -f /opt/redmine-3.2.1-0/apache2/conf/httpd.conf
# ps -ef | grep mysqld
root     11893  2755  0 18:40 pts/0    00:00:00 grep mysqld
root     24389     1  0 06:04 ?        00:00:00 /bin/sh /opt/redmine-3.2.1-0/mysql/bin/mysqld_safe --defaults-file=/opt/redmine-3.2.1-0/mysql/my.cnf --socket=/opt/redmine-3.2.1-0/mysql/tmp/mysql.sock --datadir=/opt/redmine-3.2.1-0/mysql/data --log-error=/opt/redmine-3.2.1-0/mysql/data/mysqld.log --pid-file=/opt/redmine-3.2.1-0/mysql/data/mysqld.pid --lower-case-table-names=1
mysql    24651 24389  0 06:04 ?        00:00:44 /opt/redmine-3.2.1-0/mysql/bin/mysqld.bin --defaults-file=/opt/redmine-3.2.1-0/mysql/my.cnf --basedir=/opt/redmine-3.2.1-0/mysql --datadir=/opt/redmine-3.2.1-0/mysql/data --plugin-dir=/opt/redmine-3.2.1-0/mysql/lib/plugin --user=mysql --lower-case-table-names=1 --log-error=/opt/redmine-3.2.1-0/mysql/data/mysqld.log --pid-file=/opt/redmine-3.2.1-0/mysql/data/mysqld.pid --socket=/opt/redmine-3.2.1-0/mysql/tmp/mysql.sock --port=3306
# ps -ef | grep subversion
root     13115  2755  0 19:27 pts/0    00:00:00 grep subversion
498      24732     1  0 06:05 ?        00:00:00 /opt/redmine-3.2.1-0/subversion/bin/.svnserve.bin -d --listen-port=3690 --pid-file=/opt/redmine-3.2.1-0/subversion/tmp/svnserve.pid
プロセスのリッスンポートの確認
ApacheとMySQL、Subversionがリッスン状態であることを確認します。
# netstat -tanp
Active Internet connections (servers and established)
Proto Recv-Q Send-Q Local Address               Foreign Address             State       PID/Program name
tcp        0      0 127.0.0.1:37949             0.0.0.0:*                   LISTEN      25074/Passenger Rub
tcp        0      0 0.0.0.0:3690                0.0.0.0:*                   LISTEN      24732/.svnserve.bin ←Subversion
tcp        0      0 127.0.0.1:3306              0.0.0.0:*                   LISTEN      24651/mysqld.bin ←MySQL
tcp        0      0 0.0.0.0:22                  0.0.0.0:*                   LISTEN      1221/sshd
tcp        0      0 127.0.0.1:25                0.0.0.0:*                   LISTEN      1331/master
tcp        0     96 160.16.242.176:22           218.221.114.171:62783       ESTABLISHED 23897/sshd
tcp        0      0 :::80                       :::*                        LISTEN      24983/httpd.bin ←Apache
tcp        0      0 :::22                       :::*                        LISTEN      1221/sshd
tcp        0      0 ::1:25                      :::*                        LISTEN      1331/master
tcp        0      0 :::443                      :::*                        LISTEN      24983/httpd.bin ←Apache
Web画面の表示確認
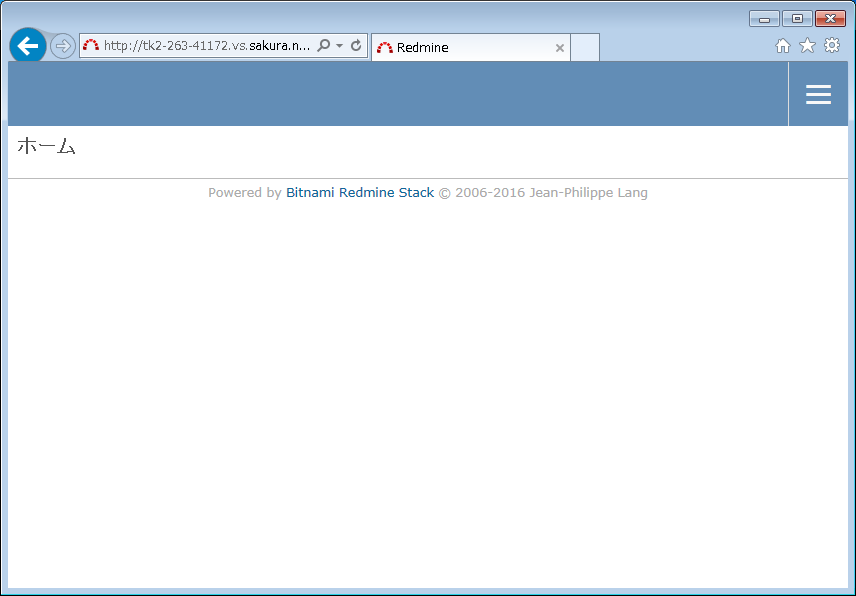
I.E.11を起動して、さくらのVPSで提供されている情報を確認し、「http://標準ホスト名/」もしくは「http://IPアドレス/」をURLに入力してアクセスします。
Redmineへのログイン確認
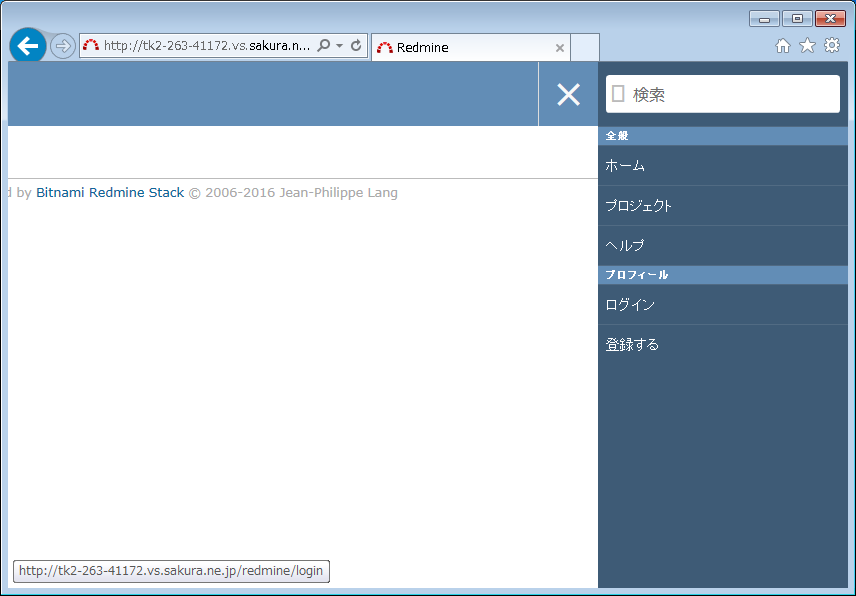
I.E.11を起動して、さくらのVPSで提供されている情報を確認し、「http://標準ホスト名/redmine/」もしくは「http://IPアドレス/redmine/」をURLに入力してアクセスします。
画面右上の横線3本で表されるメニューボタンをクリックします。
メニューが表示されたら、[ログイン]をクリックします。
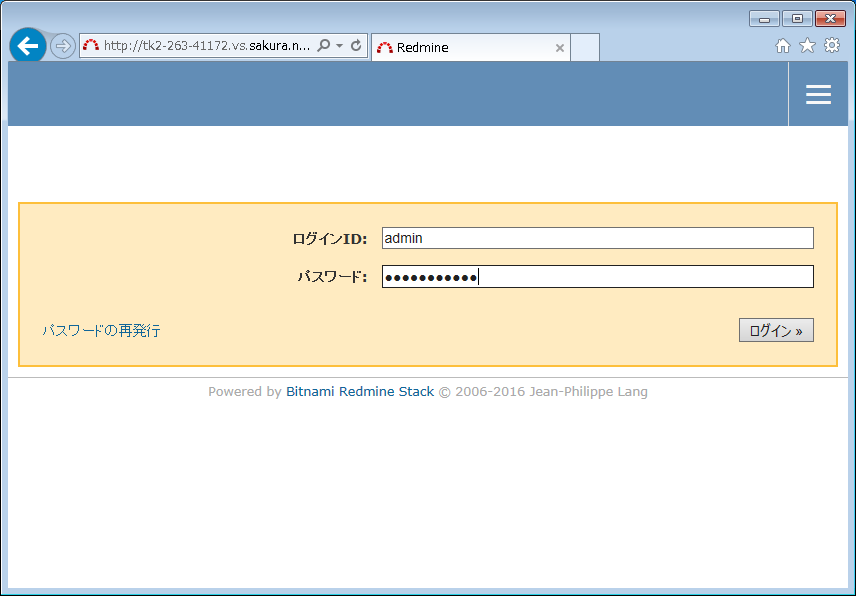
ログイン画面が表示されたら、[ログインID]と[パスワード]を入力し、[ログイン]ボタンをクリックします。
ログインするとホーム画面に戻ります。 再度画面右上のメニューボタンをクリックします。

メニューの検索フォームの下にログインユーザである admin と表示されています。 メニューから[ログアウト]をクリックします。

ログアウトされるとホーム画面に戻ります。